Wednesday, May 1, 2019

Blog #5

Ingredients:
  • Olive oil
  • Cornmeal (to help slide the pizza onto the pizza stone)
  • Tomato sauce (smooth, or puréed)
  • Firm mozzarella cheese, grated
  • Fresh soft mozzarella cheese, separated into small clumps
  • Fontina cheese, grated
  • Parmesan cheese, grated
  • Feta cheese, crumbled
  • Mushrooms, very thinly sliced if raw, otherwise first sautéed
  • Bell peppers, stems and seeds removed, very thinly sliced
  • Italian pepperoncini, thinly sliced
  • Italian sausage, cooked ahead and crumbled
  • Chopped fresh basil
  • Baby arugula, tossed in a little olive oil, added as pizza comes out of the oven
  • Pesto
  • Pepperoni, thinly sliced
  • Onions, thinly sliced raw or caramelized
  • Ham, thinly sliced

Steps:

1: Proof Yeast
2: Make Dough
3: Let Dough rise
4: Roll Dough Out
5: Put on Olive Oil
6: Spread with Tomato Paste and preferred toppings
7: Bake Pizza

Background:
While this may be a simple recipe it holds a special place in my childhood. Me and my family or friends would always make homemade pizza. As a kid it is really cool to put your own spin on things especially when it came to most child favorite food, pizza. Also I prefer homemade pizza to pizza like Dominos or Little Caesars any-day. It was exciting as a kid going to a store (usually Trader Joe's) with my dad and picking out crazy toppings or the ingredients for our pizzas. One time I wanted to try Anchovies because I wanted to see the taste for myself and I regret it to this day because the taste was foul. Also trying to throw up the dough like I had seen workers at restaurants in the past was not as easy as I thought it would be. This is a significant meal to me and my family because it was a way for us to spend time together. All being in the kitchen making these pizzas together were some defining moments in my childhood when I remember the simpler times when I had more time and spent more of it with the people that matter the most. I enjoyed this assignment because it allowed me to reflect on these times and actually make a pizza, but unfortunately I did not film the process. But I did go out the ingredients the other night and my family did this again and I recreated this experience and had a good time because of this assignment. Also thinking about this meal in other terms it is not expensive to get all the ingredients for this meal and it is simple to make and eat (nothing fancy). But overall I think when it comes to this it is more of the significance of being with my family rather than the food/recipe. The dish could have been sardines or something else that is random or bizarre but the reason I chose this is because of the experiences attached to it and that is why I love homemade pizza.

Simple Zucchini Bread

Simple Zucchini Bread
  1. Get a pan would be big enough to make some bread. Preheat the oven to 325 degrees
  2. Sift flour, salt, baking powder, soda, and cinnamon together in a bowl.
  3. Beat 3 eggs, oil, 2 drops vanilla, and 3 tablespoons of sugar together in a large bowl
  4. Chop up some Zucchini into very small bits and add them to the top of the mix
  5. Bake for 40 to 60 minutes with the bowl ingredients in the pan
  6. Done, memories can now be made
This dish was always particularly special to me as it was one of the things I knew how to cook and have it turn out fantastic. It was also associated with many pure memories of family dinners that use to happen almost every weekend. Now a days it’s just a past memory that I want to start again as a new tradition. We all have sort of family get togethers where food is made and conversation is had. It was something that I looked forward to a lot made for some good memories in all honesty. A place where we’d cook and enjoy something with our hands and that’s where this bread stemmed from. The bread was the one thing I looked forward to every meal as it was sweet and healthy. It made for a special treat that could be enjoyed at any time and it was so simple to make even I could do it.  But with good times comes tragedy, I won’t get messy but let's just say that there was something that stopped those weekend dinners. Wasn’t too disappointed because I didn’t want the memories to fade so I kept trying to make it. That’s what kept the memory alive was making the bread and showing that you can never really give up things just because of tragedy. What’s the point? It isn’t bad to remind yourself of the past but to just celebrate it.

Besides, it's hard to find stuff these days that is healthy, tasty, and easy to make. Also it makes you look like you have skills when cooking is just instruction following. Like I said, so easy that I could even do it. And would, again and again until I could get it perfect but that’s the joy of cooking. Making something so many times and learning how to perfectly do it until all the money runs out on ingredients. Easier said than done but it was a lot of fun to make and enjoy. I hope one can understand the relationship between a man and his bread. It’s a weird one for sure but there’s some heart in those dough chunk, a little eating just has to be done to find out what’s inside. Many of us have memories linked to food and the family that helped with it. Acting like genetics, food is what ties us together and helps relate one household relate to one another. I hope I can do the same with this recipe, offer my household to another and share the joys of family with cooking.

Blog 5


Morgan Hummel
Mom’s Fried Chicken
Ingredients
·       2 chickens
·       ½ cup extra virgin olive oil
·       2 cups of flour
·       Santa Maria style seasoning
·       All season salt
·       Salt and pepper
Step 1= Preheat the oil to 425 in large electric frying pan.
Step 2 = Roll chicken in flour, place in pan.
Step 3= Season generously with all seasonings.
Step 4= Cook for 20 minutes.
Step 5= Flip chicken and season other side
Step 6= Cook for 20 more minutes.
Step 7= When chicken is crispy and golden place on cooling rack for 5 minutes.
Then serve!!!!!!
The Background
I grew up with a lot of teenagers living in my house so my mom had to make meals that were cheap, filling and could feed a lot. This was one of the fancier dinners we got, believe it or not. On usual nights it would be hot dogs and mac and cheese, or hamburger helper. We grew up on the store brand food that was cheaper, because I have 4 brothers that my parents just took in. They were all teenagers whose parents didn’t care, but my parents cared about all of them a lot. So, on Saturday nights normally when they all got home from riding all day at the dirt bike track, we would sit down as a family and eat moms fried chicken. She normally served it with mash potatoes, garlic bread, corn, pickles and cheese. So, growing up it was just a meal that brought the family together in a way. Now all my brothers are older and have their own families. When they bring their families over, they always ask for my mom to make this meal. When I was in middle school my mom taught me how to make it, I was not very good at it, and none of my brother’s wives know how to make it exactly like my mom either. So, whenever my mom wants the boys over (you know on the rare occasion she misses them), she tells them she’s making fried chicken. We all joke when she’s cooking it that the boys can smell it from their houses and will be at the front door in 20 minutes. The seasoning she uses is from the town my parents grew up in, they met while in high school in Santa Maria and got married there. So that brings a piece of where we came from to the family meal I grew up on. This meal is still something that brings us together. My brother asks for it every year for his birthday. It’s a family tradition started by my parents that I plan on continuing to cook for my family when I have one. I know it’s a simple thing to make but it truly is the meal that my family loves, so I hope you all love it to. Did I mention it tastes the best after a fun day spent outside with all your siblings? Well at least it always does to me.

Blog 5

This recipe is about how to make homemade doughnuts. Doughnuts have always been my
favorite dessert. When I was younger and really liked doughnuts, I was eager to make them
myself but I felt as though I didn't have the skills necessary to do so. While I lived in the bay
area in California and was attending middle school, my dad looked up a recipe on the internet
to see if he could make doughnuts for me. One day after I came back home from school, my
dad had made his own doughnuts using this recipe. It was an amazing surprise. This is perhaps
one of my fondest memories relating to food. They took a little while to make but they are by far
the best doughnuts I’ve ever eaten.


Ingredients:


1 cup of whole milk
1/4 cup of granulated sugar and, separately,1 teaspoon of granulated sugar
2 1/4 teaspoons of active dry yeast
4 cup of all-purpose flour
1/2 teaspoon of kosher salt
6 tablespoons of melted butter
2 large eggs
1/2 teaspoon of pure vanilla extract
Canola or vegetable oil for frying


Directions:
Grease a large bowl with cooking spray and then set it aside. Then add milk in a separate
small bowl. Microwave  the milk for about 40 seconds or until it's warm. Add a teaspoon of
sugar into the bowl of milk and stir until it's dissolved then sprinkle over yeast and let sit for
about 8 minutes.


Whisk together flour and salt in a medium sized bowl. Then, in a large bowl, whisk together
remaining sugar, butter, eggs, and vanilla. Pour the yeast mixture into the bowl of wet
ingredients, mix it, then add in dry ingredients. Stir the mix until the dough begins to take
shape. Take the dough out of the bowl and knead it until stretchy and elastic for about 5 minutes.


Shape the dough into a tight ball and then place it into the oiled bowl and cover with saran
wrap or a plate. Let dough rest and let it rise in your kitchen until doubled in size for about
1 hour. Don't put it in the oven for this step.


Put parchment paper on a baking sheet. Take the dough and roll out into a half inch thick
rectangle. Use a cutting tool or bowl to punch out your doughnut shapes. Place doughnuts
on the baking sheet and let them rest again for about a half hour.


To make a glaze, mix milk, powdered sugar, and vanilla in a large bowl. Set this aside; it
will be put on the doughnuts after they bake.


In a dutch oven, heat about 2 inches worth of oil to 350 degrees. Cook the doughnuts until
they are the perfect golden brown on both sides. This will be about 1 minute per side.


Move the cooked doughnuts onto a paper towel and pour the glaze on with a spoon. Or,
you can dip the doughnuts into the glaze mix.

Blog 5

At the beginning of the year I would hangout and have dinner with friends who lived in the student apartments here in Reno. We were craving a teriyaki burger and looked one up online that was fairly cheap. We scoured the internet for awhile until stumbling across this one recipe that looked amazing. And it did not disappoint. 

Recipe:
  

Pound the chicken until its thin and to your liking. Then put into a bag with the teriyaki sauce and brown sugar and let it marinate for 4-5 hours. Take remaining the teriyaki sauce and pour it into a bowl. Then put pineapple and chicken on grill on medium heat. While the chicken is cooking brush it with teriyaki sauce every two minutes. Cook the deli ham with a little bit of pineapple juice until browned to your liking. Then put everything between two hamburger buns and enjoy your teriyaki burger. 

Blog 5

I have been interested in cooking for years. I have started to try new recipes and change them as i go. I make a Somali Bariis recipe with my loved ones and every time i make it they get excited to eat it. I love making it every time because of how they act and the excitement that come from it. I first found this on a tasty video and i remeber seeing how much seasoning was in it and what types. It was new to me and i wanted to try it. The day i made it i told my boyfriend that i am making him dinner and he has to deal with it. He didnt argue with me and was interested in what i was making. As i was making it he would walk over and say that it smelled good. Once i was done i had him take the first bite and the look on his face was pure joy. He loved it and he asks me to make it often now. I made it for my family and they loved it as well. My dad took the recipe from me and make it when im not home and wehn i am home he asks me to add my touches to it.

Somali Bariis
Xawassh
1 Tablespoon of Ground Cumin
1 Tablespoon of Ground Coriander
1 teaspoon of Ground Turmeric
1 teaspoon of Ground Cardamon
1/4 teaspoon of Ground Cloves
1/4 teaspoon of nutmeg

Rice Pilaf
1/4 Cup Vegetable Oil
1 Medium yellow onion, thinly sliced
3 Cloves of Garlic, thinly sliced
1 Small Tomato, diced
1 Cinnamon stick
Salt to taste
1 Vegetable stock cube
1/4 Cup Fresh Clinatro, chopped
1 Tablespoon Xawaash
2 cups Basmati rice cooked

Directions
Make the Xwaash by combining Cumin, Coriander, Turmeric, Cardamon, Black pepper, Cloves, and Nutmeg. Set aside.
Heat a medium pan over medium-high heat on the tove. Add the vegetable oil, onion, tomato, garlic, and cinnamon stick. Cook until onions have sodtened slightly, -
 minutes.
Season with salt, then add the vegetable stock cube and cilantro. Cook for   minute, breaking up the stock cube.
Reduce to medium-low heat and stir in the Xawaash and cooked rice. Stir until all ingredients have combined.
Serve and enjoy!

Blog 5

Being born in Hawaii, I have grown up with eating a variety dishes that were considered mostly Asian cultured food. However, the food that I mostly grew up eating was called “spam musubi”. No matter the occasion or time of day I would eat almost every day because it was my favorite food. Back then, my parents would pick me up after I have finished school and drive to a gas station, mostly Seven-Eleven, to get snacks. When I walk into the gas station there would always be a couple of spam musubis sitting on the counter being kept warm by a hot lamp where the employee would be working the register. I would then pick up two of these great delicancies, which only costed about a dollar, so it was a total steal for me. On some days, when I’m at home I would make spam musubi myself since I couldn’t leave the house since I was very young at the time. My parents would show how to make the dish every time they would make until I knew how to make it by myself and since then then it has been ingrained into my head. On the special occasions, I would also eat spam musubi as well. During weddings, I remember at the parties there were always huge amounts food displayed on the tables. There were salads, steaks, sushi, deserts, fruit, and so much more. However, none of those foods caught my interest because I was only fixated with the spam musubi displayed. I would only a plate with spam musubi, which was probably unhealthy when I think about now. On my birthday, I wouldn’t even eat the actual birthday cake because I didn’t like cake back then, so I would just eat only the spam musubi and nothing else.

Recipe:
-4 sheets of nori (Seaweed)
-2 or 3 cups of rice (preferably white or brown rice)
-Soy sauce
-Rice cooker
-Furikake Seasoning (optional)
- 1 Can of Spam


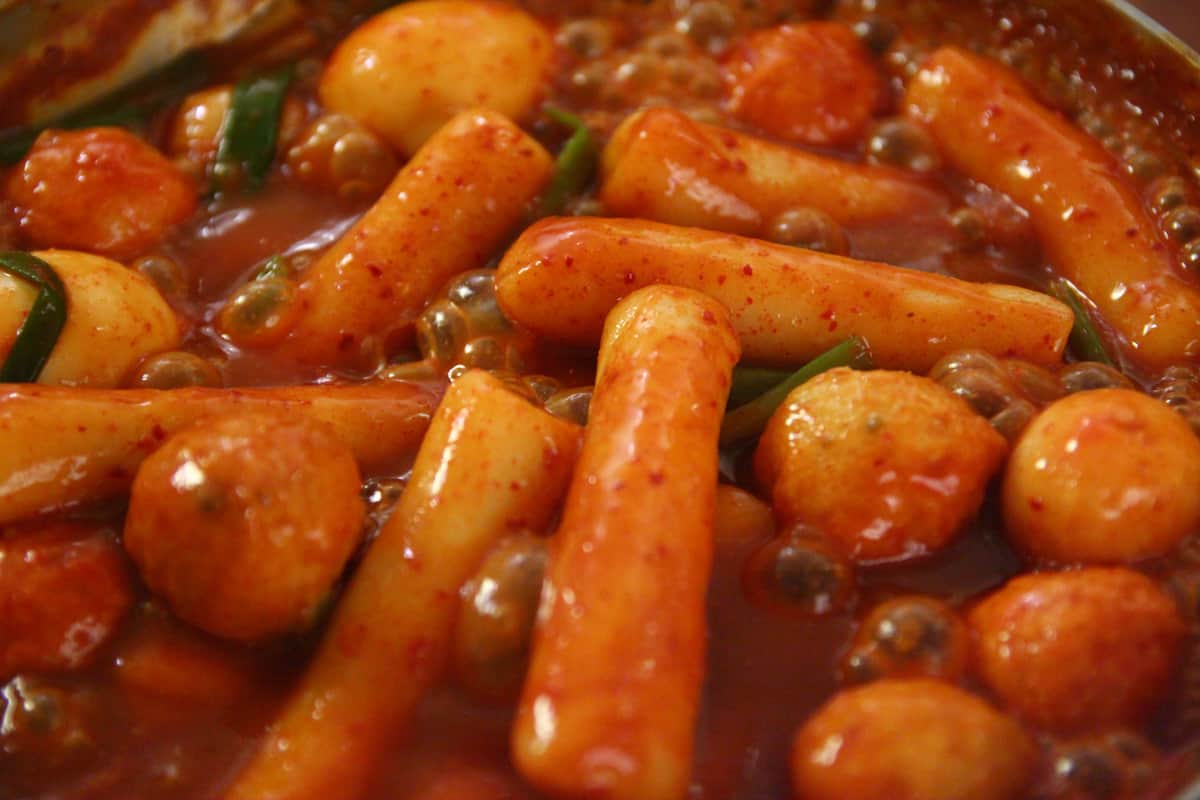
This dish is appealing to me because my grandmother and I used to make this for my whole family on Wednesday nights after soccer games. Our family's busy schedules always made us make easy meals that we could eat quickly by ourselves and then go get our homework done or watch T.V. These busy schedules were what made us happy and kept me and my brothers on track with school and our extracurricular activities, but I always loved slowing down and taking time to make a really delicious meal with my grandma. Wednesday nights were where me and her would bond the most and she could teach me all that I wanted to know. My grandma was a strict cook in the kitchen and did not want me getting hurt or burned so she was always very intricate in her directions, so I learned how to reciprocate this recipe very well. My grandmother taught me most of the Korean dishes that I know how to prepare and these were the valuable moments that I cherish with her in the kitchen. I loved that my whole family got to eat something that I made and I always felt very proud of myself when I was at the dinner table. I am part Korean and this dish makes me feel like I'm experiencing my family's culture because this is an authentic street food that has a lot of flavor and spice. I would love to transport you all through this dish to a Korean street market and let you taste the delicious savory rice cakes that are made with an assortment of meat and vegetables. 

Recipe:
  • 1 pound of cylinder shaped rice cake, bought or homemade. (Use a little more if you’re not adding hard boiled eggs and fish cakes)
  • 4 cups of water
  • 7 large sized dried anchovies, with heads and intestines removed
  • 6 x 8 inch dried kelp
  • ⅓ cup hot pepper paste
  • 1 tablespoon hot pepper flakes 
  • 1 tablespoon sugar
  • 3 green onions, cut into 3 inch long pieces
  • 2 hard boiled eggs, shelled (optional)
  • ½ pound fish cakes(optional)
Directions:
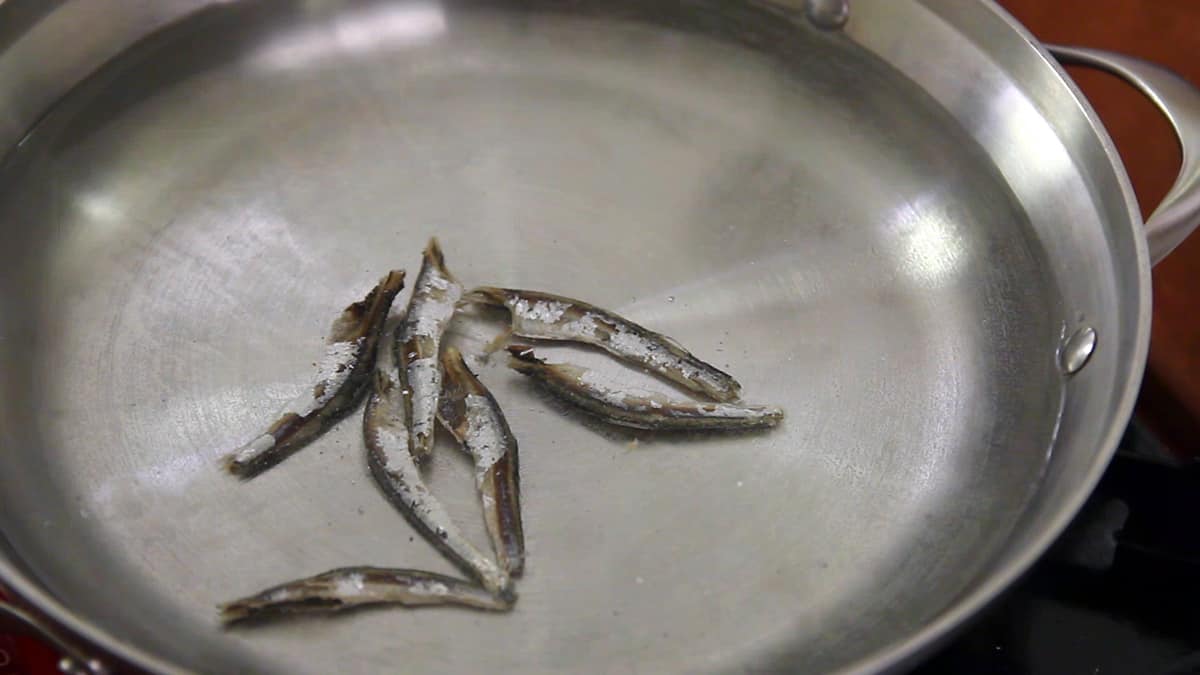
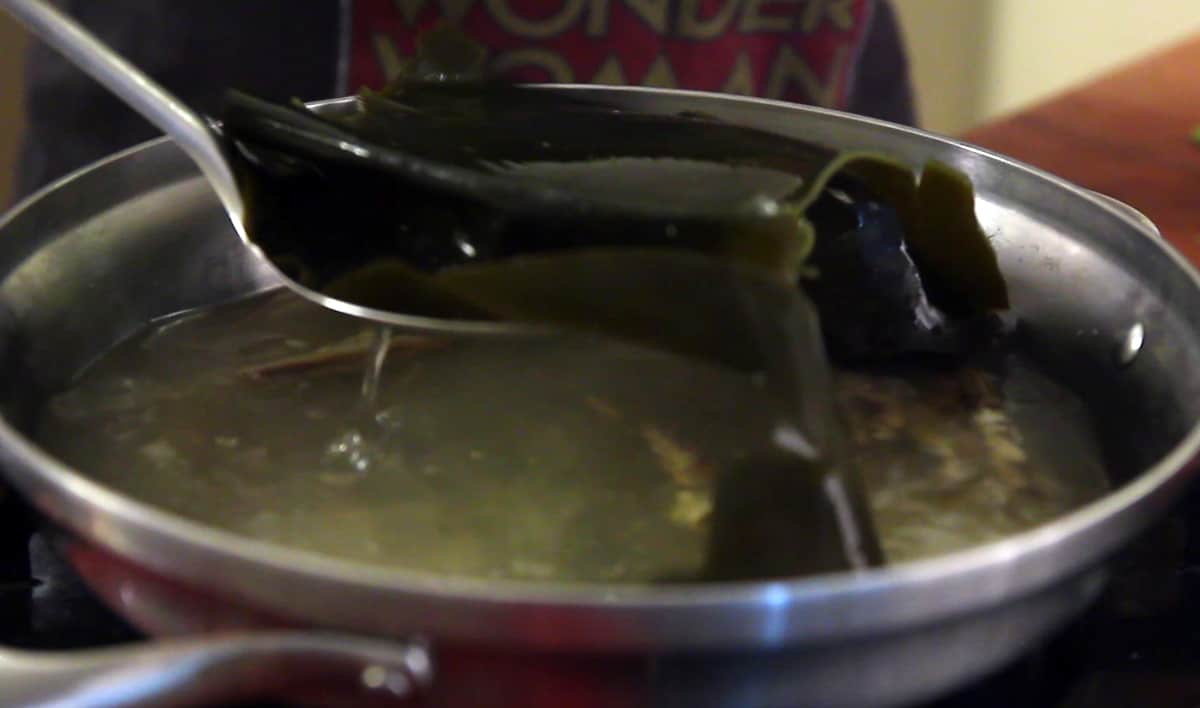
  1. Add the water, dried anchovies, and dried kelp to a shallow pot or pan.
  2. Boil for 15 minutes over medium high heat without the lid.anchovy stockanchovy stock
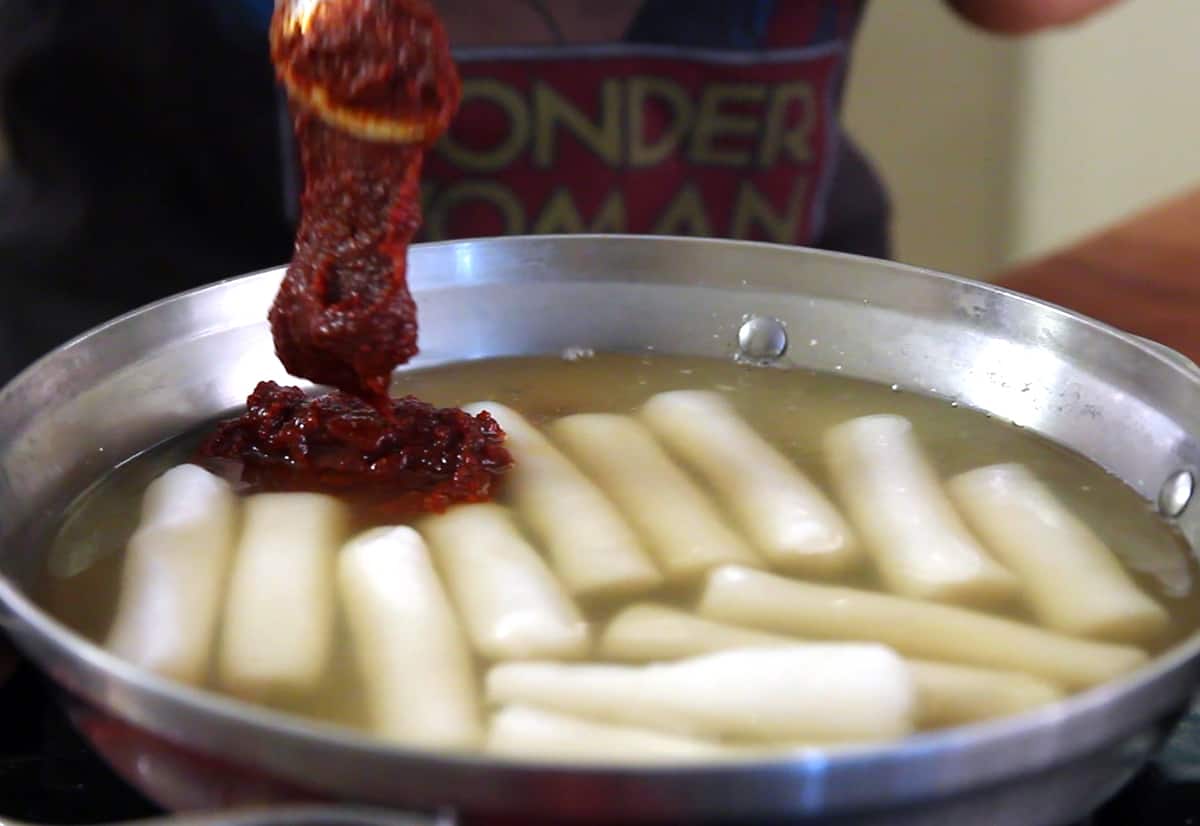
  3. Combine hot pepper paste, hot pepper flakes, and sugar in a small bowl. Remove the anchovies and kelp from the pot and add the rice cake, the mixture in the bowl, the green onion, and the optional fish cakes and hard boiled eggs. The stock will be about 2 ½ cups. ddeokbokkiddeokbokkiddeokbokkie
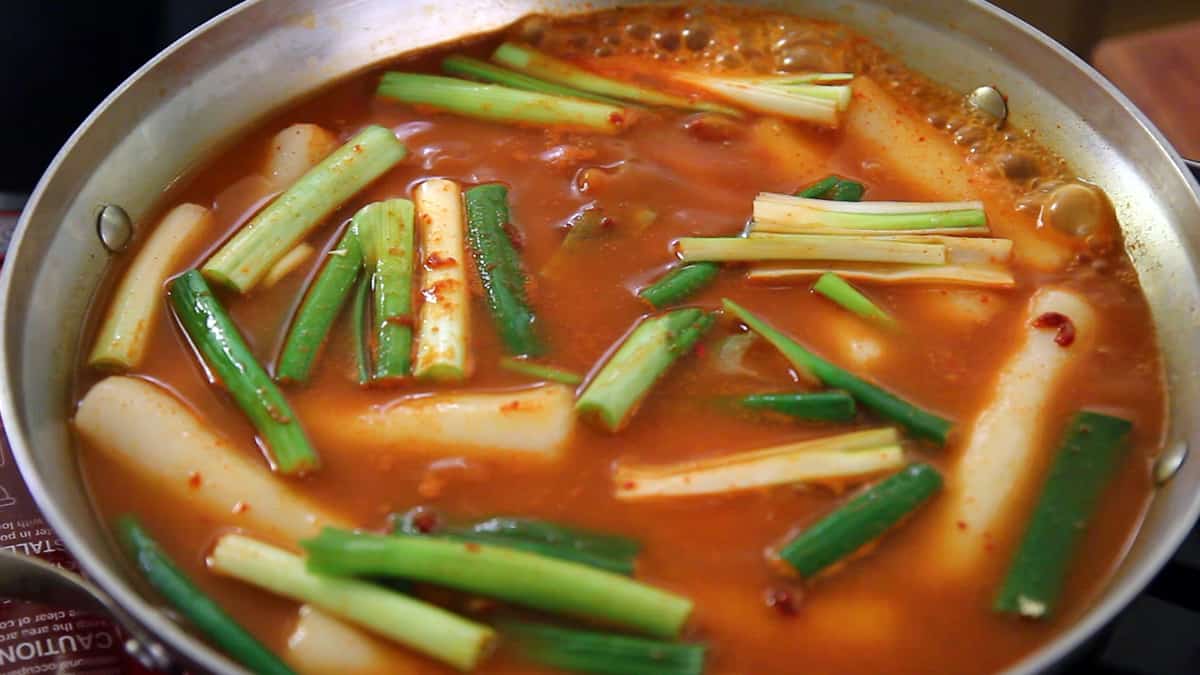
  4. Stir gently with a wooden spoon when it starts to boil. Keep stirring until the rice cake turns soft and the sauce thickens and looks shiny, which should take about 10 -15 minutes. If the rice cake is not soft enough, add more water and continue stirring until soften. When you use freshly made rice cake, it takes shorter time. If you use frozen rice cake, thaw it out and soak in cold water to soften it before cooking.ddeokbokki
  5. Remove from the heat and serve hot.
Citation :
Tator Tot Casserole

Ingredients
1 pound ground beef
1 bag of tator tots
1 can cheddar cheese soup
1 can cream of mushroom soup

Directions – Prep time 10 minutes, cook time 30-40 minutes 
1.    Preheat oven to 350°
2.    Thoroughly cook the ground beef.  Smaller pieces are better than large pieces of meat.
3.    In a large bowl mix well cooked meat, frozen potatoes, both cans of soup.
4.    Spray a 13 X 9” pan with non – stick cooking spray.
5.    Put all of the meat, soup, and potato mix in the 13 X 9” pan.
6.    Smooth the top, you may add shredded cheese on the top.
7.    Cover with foil and put in the oven.
8.    If you added cheese, uncover after ~30 minutes and allow top to crisp.
9.    Enjoy!


Tator Tot Casserole is my favorite thing to cook and eat for a few reasons. The first reason is, tator tot casserole is very easy to prepare and there aren’t too many ingredients. You can buy all the ingredients for under twenty five dollars and prepare the meal for four or more people in under an hour. Although I like tator tot casserole and how cheap it is now that I am in school, I really fell in love with tator tot casserole when I was a young child. My mom would make it a few times a year (usually on special occasions) and it was always my favorite thing to eat. My mother never really let me eat junk food so when she would make tator tot casserole, that would be my closest I got to junk food and I loved every bite. 

Pork Bicol Express

One of my favorite recipes is bicol express, more specifically pork bicol express. I've never really tried the other bicol express which are chicken or beef because I've never been given the chance to, the common bicol express that is served is usually with pork. I love this food because it is spicy and I NEVER usually eat anything spicy, I have to have a cup of water if I’m eating anything like that. However, bicol express makes it worth it, I don't mind eating it and drinking water simultaneously. The food looks good and it looks healthy, but most of all it is the only spicy food that I will eat over and over. My parents don't know how to cook this a lot so we often buy it from Filipino restaurants. My grandma often cooks it and I know she watches it from youtube videos. I would like to learn how to cook this someday, because I thought it was a whole lot of ingredients, but I'm looking at it and it doesn't seem too hard. The cooking time is at least an hour and that's actually not as bad as I thought because I use think that it took forever, but that may be I was never the one cooking it. My family knows that this is one of my favorite food that they always cook it on my birthday along with my other my favorite foods. My family doesn’t have a special recipes they often refer to the internet to cook it so here’s a recipe online that I found(that I will write in my own word obviously).
  • Ingredients:
    • 3 cups coconut milk to get that almost white color
    • 2 lbs pork belly cut into strips
    • 1/2 cup Shrimp Paste for some spice
    • 1 tbsp of cut up garlic
    • 6 pieces Thai chili or Serrano pepper for the SPICY
    • 3 tablespoons of  cut up ginger
    • 1 piece of cut up onion
    • 2 tablespoons cooking oil
    • Salt and Pepper to get some flavor

  • Directions:
    • Heat up a pan and when it is heated pour some cooking oil
    • Add the garlic, onion, and ginger to get them cooked into the pan with cooking oil
    • Add the pork and it should be cooked for 5 to 7 minutes until the color has changed into a very light brown
    • Put in some type of spicy ingredient such as thai chili or Serrano pepper
    • Pour some coconut milk in to give that creamy look and texture
    • Let the food cool down for a few minutes or until the pork is actually cooked
    • Add some salt and pepper for some taste